AB7E
Homebrew Exothermic Mold
I wanted to use exothermic weld
connections for my tower ground system, and since I expected to be
making quite a lot of them I figured it was more cost effective to use
a standard graphite mold instead of the ceramic one-shot variety.
I had trouble finding where to buy one, though, so I decided to
make my own using for reference a couple of molds I had previously
obtained at surplus prices (one for welding to horizontal rebar,
another for welding to vertical flat steel).
I stumbled across a seller on
eBay offering various chunks of graphite and I bought this one.
It was a plate roughly 12 inches on a side and 1.5 inches thick,
and it even turned out to be a premium grade of graphite (fine grain)
made by the isostatic molding process. My intention was to cut
two 4 inch by 6 inch pieces from one edge of the plate and sandwich
them together for the mold. Graphite is relatively soft and
with care can be worked using normal woodworking tools.

This is the sketch I made for
fabricating the mold. The idea was to drill two 1/4 inch holes
for bolts that would hold the two halves of the mold together, then
drill the other holes along the seam between the two halves.

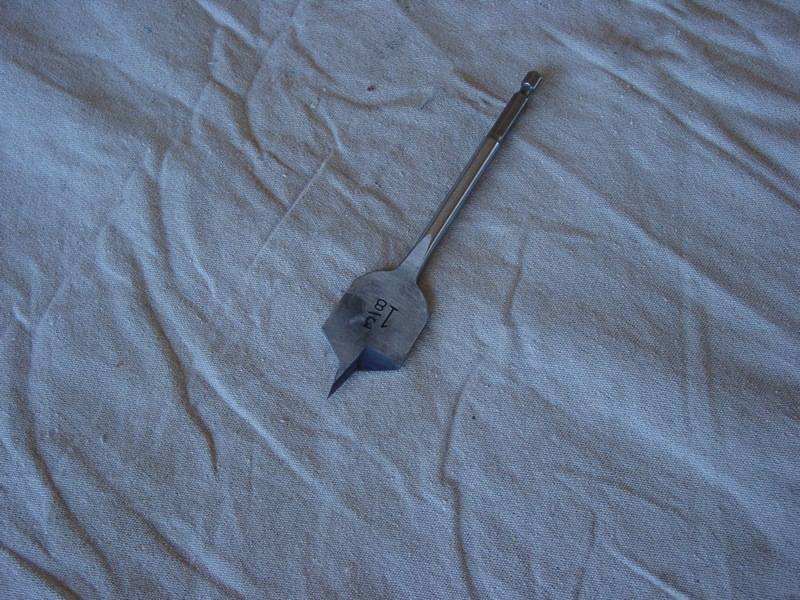
I didn't own a bit suitable for
drilling the powder chamber, though, so I had to make one. I
bought a cheap blade-type wood bit and cut bevels on it using my Dremel
tool with an abrasive cutting wheel. For the most part the bevels only needed to be similar enough to
keep the bit from wobbling when drilling the graphite ... I just drew two
lines and cut along them. I kept the cutting wheel tilted a few degrees to keep a proper angle for the cutting edge of the wood bit.
I didn't take progress pictures of each step in the process, but here is the sequence I followed:
1. Cut two 6"x4" pieces of graphite from the plate
2. Drill two 1/4 inch clamping holes in each half (using a drill press for reasonable alignment)
3. Bolt the two halves together
4. Stand the sandwich on end and drill the large hole for the powder cavity with the modified blade bit
5. Drill the 7/16" hole through the bottom of the powder cavity with a normal bit
6. Flip the sandwich over and drill the 11/16" hole (sized for 5/8 inch rod) from the bottom
7. Flip the sandwich on its sides to drill the two 7/32" holes for the wire (sized for #4 solid copper)
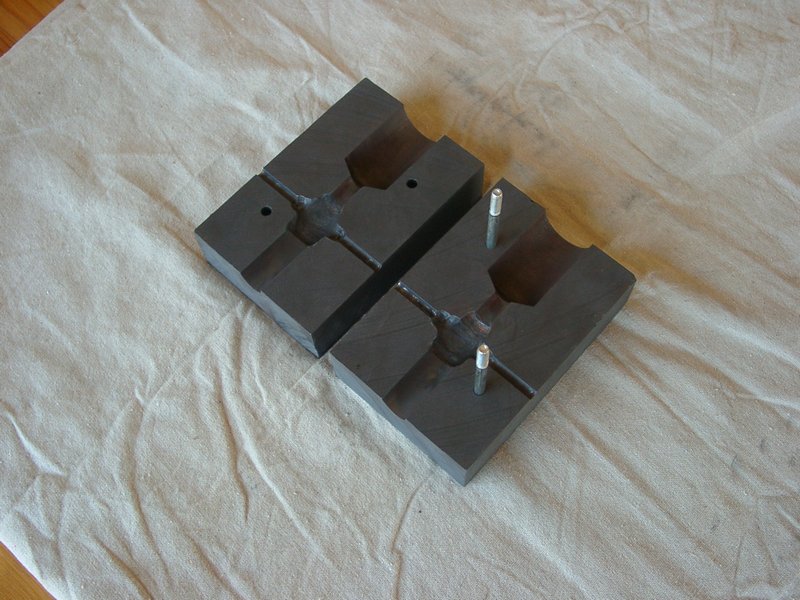
After taking the sandwich apart I
used a Dremel tool with an abrasive stone bit to grind out the cavity
for the actual weld, making sure I provided relief around the wire
and the ground rod both laterally and depth-wise. I just
freehanded that portion since precision is not needed. I'm sure I
could have simply gouged out the cavity with a knife and sanded the
surface to get it reasonably smooth. Here you can see the two
halves with the clamping bolts.
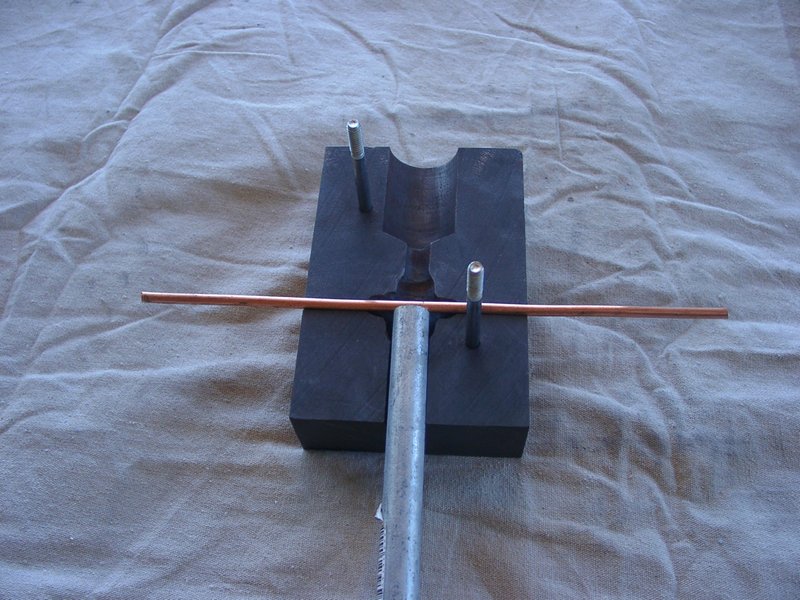
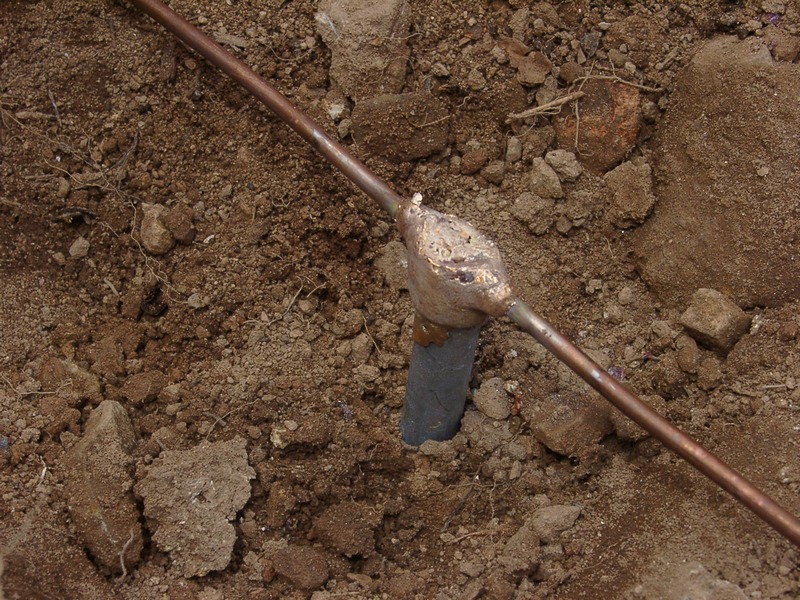
Here is how the ground rod and
the wire are postioned in the mold. I purposely made the mold a
bit wide at 4 inches in order to provide more support for the wire.
The weld metal literally melts everything in its path (certainly
the wire and even the top of the steel rod), and the wires can fall out
of the mold if you're not careful.
All ready to go. The wing nuts make assembly a snap. I found it easiest to assemble the mold around the wire and then drop it over the ground rod until the rod bottomed out against the wire. Then I attached a small clamp to the ground rod under the mold to keep the rod from pushing through the wire as it melted.
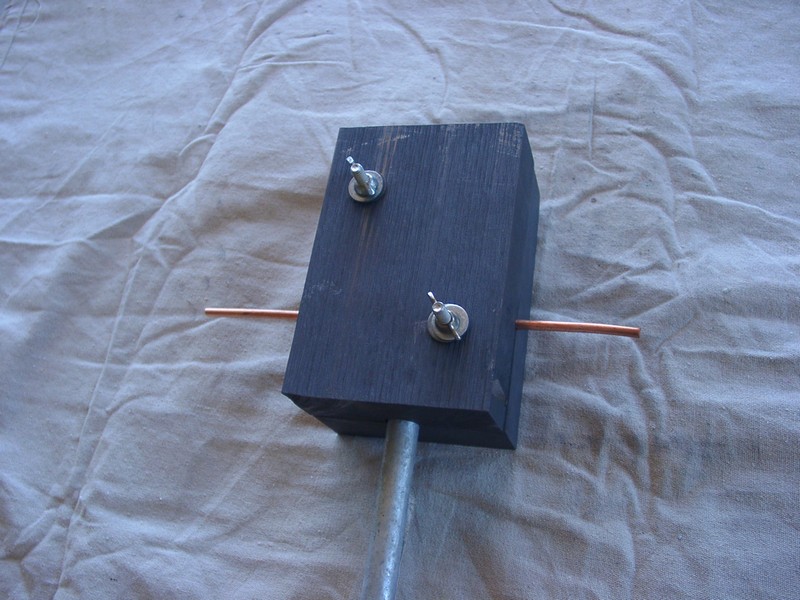
My first couple of welds didn't look so great, but once I got a little practice with the system I did much better. I used roughly 65 grams of weld metal powder obtained surplus on eBay and that seemed to be about right.
Counting the blade bit and the bolts, and neglecting the portion of the graphite plate I did not use (yet), it cost me approximately $20 and a couple of hours to homebrew the mold.
